Introduction to Amazon CloudFront
Introduction
Overview
This guide introduces you to Amazon CloudFront. In this lab you will create an Amazon CloudFront distribution that will use a CloudFront domain name in the url to distribute a publicly accessible image file stored in an Amazon S3 bucket.
Topics covered
By the end of this lab, you will be able to:
· Create a new Amazon CloudFront distribution.
· Use your Amazon CloudFront distribution to serve an image file.
· Delete your Amazon CloudFront distribution when it is no longer required.
What is Amazon CloudFront?
Amazon CloudFront is a content delivery web service. It integrates with other Amazon Web Services products to give developers and businesses an easy way to distribute content to end users with low latency, high data transfer speeds, and no minimum usage commitments.
Storing a publicly accessible image file in an Amazon S3 bucket
First, you will store the file that you wish to distribute using Amazon CloudFront in a publicly accessible location. For this lab, you will store am image file in a publically accessible Amazon S3 bucket.
- In the AWS Management Console homepage, click S3 to open the Amazon S3 console.
- In the Amazon S3 console, click Create bucket
- In the Create bucket dialog box, enter a bucket name, such as "mytestbucket".
- Leave the Region set to "default Region".
- Click Create.


Note: If you receive an error saying that your bucket name is not available, try a different bucket name (i.e. mytestbucket123). For your bucket to work with CloudFront, the name must conform to DNS naming requirements. For more information, go to Bucket Restrictions and Limitations in the Amazon Simple Storage Service Developer Guide.
- Click on your bucket in the Buckets pane.

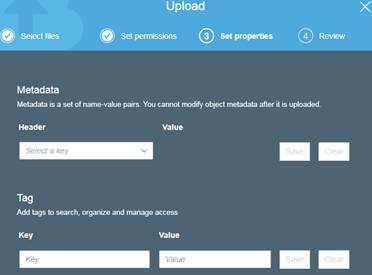
- Click Upload.

- In the Upload dialog box, click Add files.

- Choose the file that you want to upload. If you don't have a file prepared, visit a favorite website in your browser and download an image from the website to your desktop. Then choose that file for this step.
- Enable public read privileges for this file:


a. Click Next.
b. For Manage public permissions, click Grant public read access to this object(s).
- Click Upload.


After the upload completes, you can navigate to this item by its URL.
- To obtain the link to the file, click on the file name.

- Click on the displayed Amazon S3 Link to verify that your content is publicly accessible, but remember that this is not the URL you will use when you are ready to distribute your content.
https://s3-us-west-2.amazonaws.com/mytestbucketwhe/googlelogo_color_272x92dp.png
or
https://mytestbucketwhe.s3-us-west-2.amazonaws.com/googlelogo_color_272x92dp.png
or
https://mytestbucketwhe.s3.amazonaws.com/googlelogo_color_272x92dp.png - Copy the object name to a text file for later use.
Creating an Amazon CloudFront Web Distribution

Now you will create an Amazon CloudFront web distribution that distributes the file stored in the publicly accessible Amazon S3 bucket.
- In the AWS Management Console homepage, click on Services at the top of the console and then click CloudFront to open the Amazon CloudFront console.
- Click Create Distribution.

- On the Select a delivery method for your content page, in the Web section, click Get Started to select Web as the delivery method.

- On the next page, click in the Origin Domain Name box and select your Amazon S3 bucket that contains a publicly accessible image that you want to distribute (i.e mytestbucket.s3.amazonaws.com).
mytestbucketwhe.s3-us-west-2.amazonaws.com
it already shows up when you click the textbox


- Accept the default values for the rest of the parameters on this page, and click Create Distribution.


The Status column shows In Progress for your distribution on the next page. After Amazon CloudFront has created your distribution, the value of the Status column for your distribution will change to Deployed and it will then be ready to process requests. This should take around 15-20 minutes.

The domain name that Amazon CloudFront assigns to your distribution appears in the list of distributions. It will normally look something like " d1ptwzktrv3a0x.cloudfront.net." (It also appears on the General tab for a selected distribution.)
d1ptwzktrv3a0x.cloudfront.net
Using the Amazon CloudFront Web Distribution
Amazon CloudFront now knows where your Amazon S3 origin server is, and you know the domain name associated with the distribution. You can create a link to your Amazon S3 bucket content with that domain name, and have Amazon CloudFront serve it.
Create a Link to your Object
- Copy the following HTML into a new text file:
a. Replace <domain name> with the domain name that Amazon CloudFront assigned to your distribution.
b. Replace <object name> with the name of the file you uploaded in your Amazon S3 bucket
<html>
<head>My CloudFront Test</head>
<body>
<p>My text content goes here.</p>
<p><img src="http://<domain name>/<object name>" alt="my test image" /></p>
</body>
</html>
For example, if your domain name was d23dxwwsojlfor.cloudfront.net and your object was image.jpg, the URL for the link would be:|
<p><img src="http://d1ptwzktrv3a0x.cloudfront.net/googlelogo_color_272x92dp.png" alt="my test image" /></p>
http://d23dxwwsojlfor.cloudfront.net/image.jpg
- Save the text in a file that has an .html filename extension (i.e. "myimage.html").
- Open the web page you just created in a browser to ensure that you can see your content.
The browser returns your page with the embedded image file, served from the edge location that Amazon CloudFront determined was appropriate to serve the object.
Found error!
http://d1ptwzktrv3a0x.cloudfront.net/googlelogo_color_272x92dp.png
is forward to
http://d1ptwzktrv3a0x.cloudfront.net/googlelogo_color_272x92dp.png/googlelogo_color_272x92dp.png
need to change the path


Then it works!

Deleting the Amazon CloudFront Distribution
You can clean up your resources by deleting the Amazon CloudFront distribution and the Amazon S3 bucket.
To delete a distribution:
- In the right pane of the Amazon CloudFront console, check the check box for your distribution, and click Disable.

- Confirm that you want to disable the distribution by clicking Yes, Disable in the dialog box.


- Then click Close.


The value of the State column immediately changes to Disabled. Wait until the value of the Status column changes to Deployed.

- Check the check box for your distribution.
- Click Delete.
- Click Yes, Delete to confirm.

- Click Close.
To delete an Amazon S3 bucket:

- In the AWS Management Console homepage, click S3 to open the Amazon S3 console
- In the Amazon S3 console, click the bucket you want to delete.

Note, click the bucket symbol on the left of the S3 bucket name. - Click Delete bucket.
- In the Delete bucket dialog box, type the name of the bucket you want to delete.

- Click Confirm in the message box.


You have now released the resources used by your CloudFront distribution and Amazon S3 bucket.
posted by Data Tech Way @ October 10, 2017
![]()

<< Home